Review of Microsoft Virtual PC 2007 SP1
Virtual PC 2007 is an intuitive program, which saves you the bother of buying new hardware. I find it particularly useful for testing new operating systems such as Windows 7.
If you are a newbie trust me; this is an easy and rewarding program, what’s more its free. And if you are an old hand who has been disappointed with previous versions of Microsoft Virtual PCs, please give the 2007 edition a chance, it is much faster.
Review of Virtual PC 2007 SP1
- A Reminder of the 3 Key Concepts
- Stage 1 Install Virtual PC 2007
- Stage 2 Create the New Virtual Machine
- Stage 3 Installing the Guest Operating System
- Windows 8 Install
- Tips and Tricks for Virtual PC 2007
A Reminder of the 3 Key Concepts
- The Host – Windows Server 2003, Vista or even XP.
Addendum, Microsoft has a new product called Windows Virtual PC, this is designed to run on Windows 7, in other words this is where Windows 7 is the host and XP the guest. - The core program – Virtual PC 2007.
- What you run in the Virtual PC – The guest operating system, for example Windows 7.
For experienced techies, who are geniuses at computing, all you need to do is absorb these key concepts:
- Download, and then install a free copy of Virtual PC 2007.
- Create a new Virtual Machine, this will host the guest operating system.
- Obtain a 32-bit version of your guest operating system, either on DVD or as an image.
- Capture the DVD drive or the image of the Windows 7 (guest) in the Virtual Machine.
- Have patience and faith that your Windows 7 install will work.
For ordinary mortals, I will provide step-by-step instructions to help you install a Windows 7 guest operating system in Virtual PC 2007.
Mission to Install the Guest Operating System
I chose Windows 7 as my guest system. However, let us start this tutorial with the host, the operating system where Virtual PC 2007 is installed. Windows Server 2003 is a good host, and Vista not bad, however, I choose Windows Server 2008, Microsoft did their best to dissuade me on the ground that Windows Server 2008 is not a supported host. Therefore, it’s all to the credit of Virtual PC 2007 that it worked so well in less than ideal conditions.
Update: Windows Server 2008 R2 now supports VHD. The benefit is that you do not have to enable Hyper-V to mount virtual hard disks. You can mount virtual hard disks directly on your Windows 7 / Windows.
Guy Recommends : SolarWinds’ Free VM Monitor
The best feature of this new this new version of SolarWinds VM Monitor is that it checks Windows Hyper-V. Naturally, it still works with virtual machines on VMware ESX Servers. VM Monitor is a clever desktop tool that not only tests that your server is online, but also displays the CPU and memory utilization for each node.
It’s easy to install and to configure this virtual machine monitor, all you need the host server’s IP address or hostname and the logon info. Give this virtual machine monitor a try – it’s free.
Download your free copy of SolarWinds VM Monitor.
Stage 1 Install Virtual PC 2007 SP1
This is a free program, you can download Virtual PC 2007 from Microsoft’s site. It’s worth getting Virtual PC 2007 SP1 (or later) because it has better support for Windows 7, Vista, and Windows Server 2008 guests. While Virtual PC 2007 is much better than previous editions, it still does not support 64-bit guest operating systems. Just to be clear, the Virtual PC 2007 program installs on 64-bit operating systems, but then you cannot install a 64-bit guest operating system, only x86 (32-bit) versions of Windows 7 or Vista.
Actually installing Virtual PC SP1 was straightforward, it even has the product key hard coded so that you don’t need to search for one. The only important decision during install is where to store the virtual machines, I went with the default ‘My Virtual Machines’ folder. Later I regretted this decision, and moved the Virtual Machines to a different physical disk from the operating system.
Stage 2 Create the New Virtual Machine

To get a feel of what’s possible, my advice is to take a cavalier attitude and just follow the wizard – you can do no harm. Then run the wizard for a second time, but this time pausing at each screen and make more thoughtful decisions. You can delete that first virtual machine to claw-back disk space and to save cluttering up the interface.
To keep the new virtual machine setup as simple as possible, just follow the defaults, the one exception is increase the 512 Ram memory for your guest OS to 1GB. By all means adjust the settings once you have created the machine and installed the operating system.
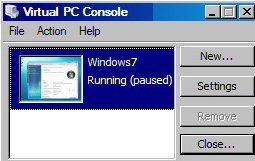
- Launch the Virtual PC Console, from the the file menu and select New Virtual Machine Wizard
Or open the Virtual PC Console then click New… - Create a virtual machine.
- Choose a location with at least 16 GB of free space.
- Operating System, Other or Vista it doesn’t matter.
- Adjusting the Ram – 512 MB Ram is recommended, I choose 1,050 MB.
- A new virtual hard disk.
- Name and Location. Previously, I created a special partition for VM images.
- Finish.


Stage 3 Installing the Guest Operating System
Once you and the wizard have created the new Virtual Machine, then click on Start.
Now pretend that you are at the console of a new piece of hardware, (remember to click ‘Start’). The knack is to access the DVD or the image containing your guest operating system.
- Click on the CD menu
- Select Capture ISO Image
- Browse to the location of where you downloaded the image of your guest OS.
An alternative from using ISO images is to access the physical DVD drive.
Once your Virtual Machine is connected to the ISO image or an actual DVD then the installation proceeds just like any other Windows installation.
Guy Recommends: SolarWinds Free Network Bandwidth Monitor

This freeware monitor is great for checking whether your network’s load-balancing is performing as expected, for example, are two interfaces are getting about equal traffic?
It’s easy to install and straightforward to configure. You will soon be running tests to see how much network bandwidth your applications consume.
The GUI has a lovely balance between immediate network traffic data in the middle, combined with buttons to seek related data and configuration settings. Give this monitor a try, it’s free!
Download your free network bandwidth monitor
If you need more comprehensive network analysis software:
Download a free trial of NPM (Network Performance Monitor)
Installing Windows 7 in the Virtual Machine


The first few menus were straightforward, the only slight hiccup was obtaining the correct product Key. Once I clicked on Microsoft’s licence agreement, the install continued by expanding the cabinets, copying files and installing Windows Server 2008’s default features. I returned 50 minutes later and found that the Windows Install had completed successfully.
At the end of this simple install, Windows 7 reboots with a GUI. At this point you should configure initial settings, starting with the Administrator’s password. Another bonus was that Windows 7 recognised the United Kingdom keyboard layout that I specified at the beginning of the install.
In terms of efficiency and intelligence, Windows 7 has Microsoft’s best install technology to date. For example, Windows Server 2003 installs are a pain, in that they halt after about 10 minutes and ask you to input networking information.
Tips and Tricks for Virtual PC 2007
No review of Virtual PC 2007 would be complete without tips and tricks to get the most from your guest machines.
Get SP1 (or later)
If you have the original Virtual PC 2007, it’s straight forward to apply SP1.
Disk Drives
Because of the heavy disk activity you will get performance gains if you move the Virtual Machines to a different physical disk.
Mouse Trapped in Your Virtual Machine?
One neat improvements with Virtual PC 2007 is the way that the mouse seems to move more seamlessly from the host to the guest operating system. Any problem and just press the Right Alt key. (In England this key is labelled ‘Alt Gr’).
Trapped in Full Screen Mode?
If you are stuck in ‘Full Screen Mode’ remember the right Alt key – and then press ‘Enter’, thus it’s Right Alt + Enter (Hold down both keys together).
Lateral Thinking – Try Remote Desktop
Instead of grappling with the Right Alt key, try a different approach and use Remote Desktop to access the guest operating system in your virtual machine. To prepare for Remote Desktop, go to the Control Panel, System and Security and then ‘Allow Remote Access’. Move the radio button down to ‘Allow access from computers..’ Take 10 seconds to read the options.
Virtual Machine Additions
Install Virtual Machine Additions with their extra drivers allow the guest operating systems to run at least twice as fast as if you don’t bother to run this setup routine.
One problem when you click on ‘Install or Update Virtual Machine Additions’, is that nothing happens. The solution is to navigate to the virtual CD, Windows folder, and then double-click ‘Setup’. You know the job has completed successfully when a menu appears inviting you reboot the virtual machine.
Avoid Sleep!
Sleep settings on either the host or the guest operating system can disturb equilibrium. If all else fails reboot the host rather than just restarting the guest. For similar reasons avoid using Laptops to host virtual machines.
Hosts: Virtual PC 2007 SP1 supports more hosts, most modern operating systems can act as home for the virtual software. Examples, Window Server 2003 and XP.
Guest Operating Systems: If you remember, these are the operating systems that you are testing. As with the host, most modern Windows operating systems can persuaded to work in Virtual PC, including Windows 7, Vista and Windows Server 2008. However, keep in mind the guests must be the 32-bit (x86) versions of the software.
It’s always beneficial to try the latest service pack. SP1 made all the difference in getting Virtual Server 2007 to run on Windows Server 2008. Incidentally, the reason I wanted to do this is that my hardware did not support Server 2008’s own virtualization technology.
Virtual PC 2007 File Types
The whole point of understanding these files types is that you can look out for existing images (.vhd) with a view to downloading them and adding to your virtual machines. These single .vhd files contain structures representing the hard disk, and the all the usual files associated with the (guest) operating system.
Another trick is to copy an existing .vhd file and work with that guest operating system, while preserving the original. For example comparing Vista SP1 (original) with Vista SP2 (copied + SP2 applied). The benefit is saving you time installing the operating system from scratch.![]()
Virtual Machine Hard Drive Image (.vhd) [Big file]
Virtual Machine Settings File (.vmc) [Small inf file]
The only possible confusion is with Virtual PC 2007’s own files which are stored separately in the Program Files –> Microsoft Virtual PC folder.
Creating your own VHD Files
Microsoft has a command line tool called WIM2VHD which allows you to create Sysprep images using Windows 7 as the source. The result is an image file that works with Virtual PC 2007 and Microsoft’s Hyper-V.
Previous Versions of Virtual PC
Virtual PC 2004 was one of my favourite versions of the this ‘pretend’ software. I never took to Virtual PC 2005, hence was so pleased when Microsoft released Virtual PC 2007.
Summary of Installing Windows 7 on Virtual PC 2007
After a quick review the concepts of Virtual Machine, Host and Guest Operating systems, obtain your copy of Virtual PC 2007 SP1 from Microsoft. Installing the software is easy, then call for the wizard to assist creating your actual Virtual Machine with it’s guest operating system. Finally, do remember to install the Virtual Machine Additions.
If you like this page then please share it with your friends