Vista Registry – Vista Registry – Deleting the Recycle Bin Problem
If you are facing Vista’s Deleted Recycle Bin problem, then you are not alone. It is a common mistake to lose the recycle bin, fortunately there is a quick solution, ‘Personalize’ the desktop. I also have a more permanent solution, which is to remove ‘Delete’ from the Recycle Bin’s properties; however, this requires a registry tweak.
Topics for Deleting the Recycle Bin Problem
- Why People Delete the Recycle Bin
- Quick Instructions to Find the Lost Recycle Bin
- Example 1: Remove Delete from the Recycle Bin Properties
- Example 2: .Reg file to Replace ‘Delete’ with ‘Guy’s Search’
- Screenshot of Delete Recycle Bin Registry Setting
- Key Points
- Example .Reg file to Replace ‘Delete’ with ‘Guy’s Search’
- Recycle Bin Won’t Empty Problem
- Corrupted Recycle Bin Problem
♦
Why People Delete the Recycle Bin
An understanding of why people delete their recycle bin will help us prevent further occurrences of this problem.
It seems to me that Microsoft has tried to provide extra features for Vista in general, and for the Recycle Bin in particular. Unfortunately, in the case of the Recycle Bin they underestimated users’ ability to read and understand the menus.
Confusion is caused by the two options, ‘Delete’ or ‘Empty Recycle Bin’. When people decide to empty their rubbish, their brain is already thinking ‘delete’. So when they see the word ‘Delete’ on the bin’s shortcut menu, they click on that instead of looking for the option to ‘Empty Recycle Bin’.
As a result of making the wrong choice, the user is surprised when the Recycle Bin disappears from the desktop! Incidentally, the reason this deleted recycle bin problem has suddenly surfaced, is that in XP you cannot delete the Recycle Bin in the manner described above. The overall message is: more features mean more chances of making a mistake.
Quick Instructions to Find the Lost Recycle Bin
1) right-click the Vista Desktop
2) Click on Personalize
3) Select: ‘Change desktop icons’
4) At the Desktop Icon Settings, place a tick next to: ‘Recycle Bin’.
Incidentally, my friend ‘Mad’ Mick has a novel suggestion. Instead of worrying about the deleted bin, just delete the User! If only life were this simple.
Step-by-Step Instructions to Find a Deleted Vista Recycle Bin
Recommended: Solarwinds’ Permissions Analyzer – Free Active Directory Tool
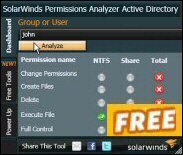
I like thePermissions Analyzer because it enables me to see WHO has permissions to do WHAT at a glance. When you launch this tool it analyzes a users effective NTFS permissions for a specific file or folder, and takes into account network share access, then displays the results in a nifty desktop dashboard!
Think of all the frustration that this free SolarWinds utility saves when you are troubleshooting authorization problems for user’s access to a resource. Give this permissions monitor a try – it’s free!
Download SolarWinds’ Free Permissions Analyser – Active Directory Tool
Registry Tweak to Effect a Permanent Cure
Example 1: Remove Delete from the Recycle Bin Properties
Here is an ideal solution for when you have an incompetent user, who keep on deleting their Recycle Bin, and then pesters you to cure their clumsiness. My mission is to edit the registry and re-program the Recycle Bin’s short cut menu.
 1) Launch regedit (See more details on starting regedit)
2) In Regedit, navigate to the following key:
HKCR\CLSID\{645FF040-5081-101B-9F08-00AA002F954E}
3) To create a new registry Key called ‘Shell’, click on the Edit Menu, New, select: Key and name it ‘Shell’. You should now have:
HKCR\CLSID\{645FF040-5081-101B-9F08-00AA002F954E}\Shell
3) Under Shell create a new (Sub) Key called ‘Delete’. Click on the Edit Menu, New, select: Key. You should now have:
HKCR\CLSID\{645FF040-5081-101B-9F08-00AA002F954E}\Shell\Delete
4) Edit the ‘Default’ REG_SZ, as this is just a string value for display you could set to anything you like, for example ‘YourName’s Indestructible Bin’.
Conclusion
What you have done is replace a working function called ‘Delete’, with a cosmetic label called Xyz’s Indestructible Bin. The sole purpose is to prevent users pressing ‘Delete’ and thus losing their Recycle Bin.
.
Screenshot of the Delete Recycle Bin Registry Setting

Key Points
- Is Vista’s CLSID a folder in HKCU** or HKLM?
Answer: Neither, it is in HKCR (Classes_Root) - Do you have to add a value, modify or delete?
Answer: Add two Keys, then modify the Default value - Is it a String Value or a DWORD?
Answer: Add a Key and also add a String Value. - Do you need to Restart or merely Log Off / On?
Answer: Neither, just refresh the Windows Desktop
** HKLM is an abbreviation of HKEY_LOCAL_MACHINE, and HKCU is shorthand for HKEY_CURRENT_USER. These acronyms are so well-known that you can even use them in .reg files, Vista will understand and obey the registry instruction.
Registry Tweak – To Re-program the Recycle Bin Properties
This example builds on the previous registry tweak and adds extra capabilities to the Recycle Bin menu. The above example 1 has the limitation that if you click on the label called: ‘Guy’s Indestructible Bin’, then you get an error message. Whereas the example below wires up the ‘Search..’ capability to the shortcut menu. If you remember, the original problem was that users saw ‘Delete’ on the menu and clicked it; the result was instead of emptying the trash, they removed the Recycle Bin from their desktop. Example 2 below creates a new menu item called ‘Search…’.
Example 2 .Reg file to Replace ‘Delete’ with ‘Guy’s Search’.
If you have lots of machines to configure, then a .reg file will save time merging the data into the registry.
Instructions for using creating the .reg file.
- Copy the settings below into a text file.
- Save the file with .reg extension, for example Recycle.reg.
- You now have three ways of transferring the settings into your Vista Registry:
a) Double-click the .reg file
b) Launch Regedit then select, File (menu) Import
c) Right-click the .reg file, select Merge from the drop-down menu
[HKEY_CLASSES_ROOT\CLSID\{645FF040-5081-101B-9F08-00AA002F954E}\shell\Delete]
@="Guy’s Search…"
"Description"="Removes Delete, replaces with Search.."
[HKEY_CLASSES_ROOT\CLSID\{645FF040-5081-101B-9F08-00AA002F954E}\shell\Delete\command]
@=hex(2):25,00,77,00,69,00,6e,00,64,00,69,00,72,00,25,00,5c,00,65,00,78,00,70,\
00,6c,00,6f,00,72,00,65,00,72,00,2e,00,65,00,78,00,65,00,00,00
[HKEY_CLASSES_ROOT\CLSID\{645FF040-5081-101B-9F08-00AA002F954E}\shell\Delete\ddeexec]
@="[FindFolder(\\\"%l\\\", %I)]"
"NoActivateHandler"=""
[HKEY_CLASSES_ROOT\CLSID\{645FF040-5081-101B-9F08-00AA002F954E}\shell\Delete\ddeexec\Application]
@="Folders"
[HKEY_CLASSES_ROOT\CLSID\{645FF040-5081-101B-9F08-00AA002F954E}\shell\Delete\ddeexec\topic]
@="AppProperties"
This .Reg file is based on an original idea by Ramesh Srinivasan
Key Learning Points
Note 1: This .reg file adds command code, consequently, when you click on ‘Search..’, your action launches Explorer and ‘FindFolder’.
Note 2: Observe how the .reg file creates the registry folders (Keys) that we built manually in Example 1: \shell\Delete. Also trace how two sub, sub folder are created, ddeexec and command.
Guy Recommends: A Free Trial of the Network Performance Monitor (NPM) v11.5
v11.5
SolarWinds’ Orion performance monitor will help you discover what’s happening on your network. This utility will also guide you through troubleshooting; the dashboard will indicate whether the root cause is a broken link, faulty equipment or resource overload.
What I like best is the way NPM suggests solutions to network problems. Its also has the ability to monitor the health of individual VMware virtual machines. If you are interested in troubleshooting, and creating network maps, then I recommend that you try NPM now.
Download a free trial of Solarwinds’ Network Performance Monitor
Recycle Bin Won’t Empty Problem
Here is a different problem. When you empty the Recycle bin, the rubbish still appears to be in the bin.
This is literally an optical illusion. The bin is actually empty, it’s just that it’s displaying the Recycle Bin (Full) icon instead of the Recycle Bin (Empty) icon.
The solution to the Vista Recycle bin will not empty:
- Right-click on the Vista Desktop, select Personalize.
- Click ‘Change desktop icons’ link in the tasks pane.
- Select the icon ‘Recycle Bin (Full)’ and click ‘Restore default’.
- Also, select ‘Recycle Bin (empty)’ and again, click ‘Restore default’.
- To exit saving changes, click the ‘OK’ button.
Corrupted Recycle Bin Problem
- Open Explorer.
- Press the ‘Alt’ key for 5 seconds, this will display the File Edit View Tools menu.
- From the Tools menu, select View
- Click the radio button next to ‘Show hidden files and folders’
- In Windows Explorer, view your c: drive
- Locate a file in the root called: $Recycle.bin. Delete this file.
- Click ‘Yes’ to the warning.
- A new $Recycle.bin file will be created.
- Any corruption will be cured.
Summary of Deleting the Recycle Bin Problem
Deleting the Recycle Bin is a classic case of once you understand why people do what they do, then you can cure the problem. Check the Recycle Bin properties menu and observe the two options, ‘Delete’ and ‘Empty Recycle Bin’. I offer you a short term solution via the Desktop Properties, Personalize, and a long term solution via a registry tweak.
If you like this page then please share it with your friends
Windows Vista Registry Tweaks:


