How to Personalize Vista’s Windows AERO Graphics
I will show you how to Personalize the color scheme for your Vista Aero graphics. This advice also helps with the disappearing Aero problem. There are four options: Vista Aero (Best), Windows Vista Basic, Windows Standard and Windows Classic. For the Aero effect, I will explain your choices to fine-tune the graphics settings.
Unfortunately, in certain situations the Vista Windows Aero graphics reverts to Windows Vista Basic, consequently, you lose the translucent ‘Aero Glass’ effect and also Flip 3D does not work. Of course it’s Mr Nobody’s fault, but rather than pointing blame, this page shows you how to configure the Aero Graphics to your liking.
Windows Vista Aero Topics
- How to Control Vista’s Appearance Settings
- Windows Aero (Best)
- Windows Vista Basic
- Windows Vista Classic
- Fine Tuning Your Aero Graphics
- Troubleshooting Windows Aero Graphics
♦
How to Control Vista’s Appearance Settings
- Right-click a blank area on the Vista Desktop
- Click on Personalize.
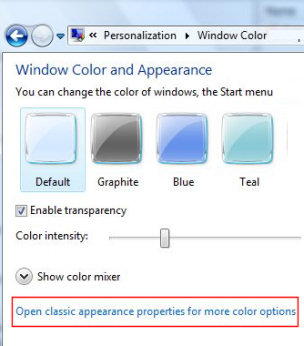
- Click on the link: Windows Color and Appearance
- The crucial link that you need to click is down at the bottom:
Open classic appearance properties for more color options.

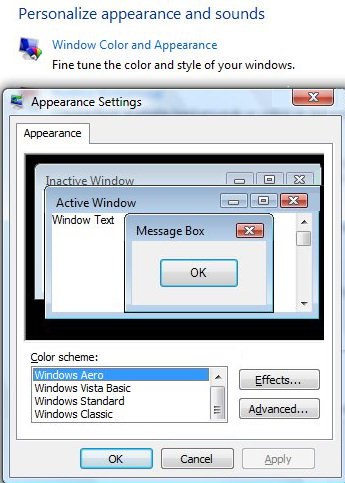
- Examine the Color Scheme
- ‘Windows Aero’ is the best choice.
- Note 1: If there is no ‘Windows Aero’ option, then it means that you system cannot run that Color scheme. (Could be Home Basic Edition?)
- Note 2: Do make sure that there is a tick next to the ‘Enable transparency’. A tick mean use the Aero Glass effect.

Windows Aero (Best)
®