Introduction to Windows PowerShell’s Profile Path
Old timers can remember configuration files such as AutoExec.bat and Config.sys to control the startup environment, and more modern Microsoft operating systems need boot.ini or bcdedit. Well, the purpose of this page is to configure the equivalent PowerShell start-up file: Microsoft.PowerShell_profile.
PowerShell User Profile Topics
- Mission to Create a Basic PowerShell Profile File
- Enabling PowerShell Scripts
- Locating the Path to the Profile File
- Viewing Microsoft.PowerShell_profile with Explorer
- Alternative Method for Creating the Profile File
- Killer Reason For Mastering the PowerShell Profile
♣
Mission to Create a Basic PowerShell Profile File
When I installed my Windows PowerShell it did not configure the profile.ps1 file automatically. A little research revealed that the key folder is called ‘WindowsPowerShell’. I want to spare you the grief I suffered in finding and creating my profile file.
Remember that the purpose of these Microsoft PowerShell profile files is to control the initial settings, for example, set the working directory and add PowerShell snap-Ins.
Enabling PowerShell Scripts
Profiles.ps1 is a script file; by default you cannot run any scripts; this is because at install the ExecutionPolicy is set to Restricted. Without making the following configuration change you may get an error message: ‘The execution of scripts is disabled’. Incidentally, this is the same command that allows all PowerShell’s scripts to run.
The best method is to employ PowerShell’s very own commands to manipulate the registry:
Set-ExecutionPolicy Unrestricted.
Or to be more securely:
Set-ExecutionPolicy RemoteSigned
Note 1: Investigate further with: Get-Help Set-ExecutionPolicy -full.
Recommended: Solarwinds’ Permissions Analyzer – Free Active Directory Tool
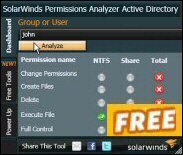
I like the Permissions Monitor because it enables me to see WHO has permissions to do WHAT at a glance. When you launch this tool it analyzes a users effective NTFS permissions for a specific file or folder, and takes into account network share access, then displays the results in a nifty desktop dashboard!
Think of all the frustration that this free SolarWinds utility saves when you are troubleshooting authorization problems for user’s access to a resource. Give this permissions monitor a try – it’s free!
Download SolarWinds’ Free Permissions Analyser – Active Directory Tool
Locating the Path for the PowerShell Profile File
Before we can configuring settings in profile.ps1, or Microsoft.PowerShell_profile, we must find it! Another problem could be that none of the possible profile files exist. For a solution, let us employ PowerShell’s own Test-Path cmdlet:
# Check path of PowerShell profile file
Test-Path $Profile
Note 2: $Profile is an environmental variable.
Note 3: If the result is ‘False’ then we can use PowerShell itself to create the file, thus:
# Command to create a PowerShell profile
New-Item -path $profile -type file -force
Note 4: Once more, we can use PowerShell to edit this crucial configuration file Microsoft.PowerShell_profile.
# PowerShell command to edit profile
Clear-Host
If ((Test-Path $Profile) -eq "True") {Notepad $Profile}
Else {Write-Host "Still no profile file"}
Simple ideas for your profile file
I like to use my Microsoft.PowerShellISE_profile file to set the path to my PowerShell scripts. If you use the code below please change D:\PowerShell to reflect YOUR script store. The welcome message is just a bit of fun, it also helps in testing to be sure that the edit has worked. Close, then re-open PowerShell to see the message.
Set-Location D:\Powershell
Clear-Host
# Welcome message
"You are now entering PowerShell : " + $env:Username
Guy Recommends: A Free Trial of the Network Performance Monitor (NPM) v11.5
v11.5
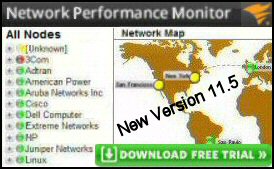
SolarWinds’ Network Performance Monitor will help you discover what’s happening on your network. This utility will also guide you through troubleshooting; the dashboard will indicate whether the root cause is a broken link, faulty equipment or resource overload.
What I like best is the way NPM suggests solutions to network problems. Its also has the ability to monitor the health of individual VMware virtual machines. If you are interested in troubleshooting, and creating network maps, then I recommend that you try NPM now.
Download a free trial of Solarwinds’ Network Performance Monitor
Viewing Microsoft.PowerShell_profile with Windows Explorer
Preparation: Navigate to your Windows directory called,
Users
or
‘Documents and Settings’.
Now find a sub folder called: %username%\My Documents\WindowsPowerShell e.g.
C:\Users\YourName\My Documents\WindowsPowerShell
N.B. This folder is now called WindowsPowerShell (not PSConfiguration)
PowerShell Profile in Windows 7

Note 5: Observe the above filenames: Microsoft.PowerShell_profile is for the command-line, while the GUI version has ISE in the filename.
 PowerShell Profile Location in XP

 Guy Recommends: Response Time Viewer for Wireshark

Here is a free tool to troubleshoot network connection and latency problems. Key concept: this is a free tool from SolarWinds that analyzes network packets captured by Wireshark (also a free tool).
When you inspect the data in the Response Time Dashboard, if you hover over an application such as Teredo or TCP, then you get an orange box showing a breakdown of network and application response times, note the 'Peak value' in addition to the 'Average'.
Download your free trial of SolarWinds Response Time Viewer for Wireshark
Alternative Method for Creating the Profile File
As an alternative to using PowerShell itself to create the file, you could launch notepad and create a files called, Microsoft.PowerShell_profile, Microsoft.PowerShellISE_profile and profile.ps1. Make sure that you have the correct file extension, .ps1 and not .txt. To recap; you should now see the file and folder in the above screen shots.
C:\Users\%username%\My Documents\WindowsPowerShell\profile.ps1
or
C:\Documents and Settings\%username%\My Documents\WindowsPowerShell\profile.ps1
Note 6: The name of this file is ‘profile’ – singular (Or Microsoft.PowerShell_profile, Microsoft.PowerShellISE_profile).
Edit your profile: In the file that you created called profile.ps1, add instructions to configure your command shell. I begin by adding a simple phrase to prove that it’s my profile.ps1 which is active and not the default profile.ps1. "You are now…..". PowerShell also supports the $env:Username variable.
Set-Location d:\powershell
Clear-Host
# Welcome message
"You are now entering PowerShell : " + $env:Username
Check your message: Now launch PowerShell.
Once you have succeeded in placing your profile.ps1 in the correct path, then you should see a similar command line to the screen shot to the right.
Note 7: As ever, my mission is to get you started, however, if you are interested, you can research more flashy commands to enter into this startup configuration file: profile.ps1.
Killer Reason For Mastering the PowerShell Profile.ps1
Launching Snap-Ins automatically is the killer reason for mastering PowerShell Profile.ps1. A PowerShell snapin contains extra cmdlets, usually for a specialist purpose such as Quest’s Active directory family of cmdlets. The trick is wire-up PowerShell Profile.ps1 to load these snap-Ins at startup.
# PowerShell Profile for PSSnapin
Set-Location e:\powershell\
Add-PSSnapin quest.activeroles.admanagement
# Welcome message
$Guy = $env:Username.ToUpper()
Write-Host "You are now entering PowerShell: $Guy"
Note 8: For this to actually work you need to download and install the snapin. See more about PowerShell Snap-Ins.
Note 9: Another popular way of increasing the range of PowerShell commands is to import modules.
Guy Recommends: Free WMI Monitor for PowerShell
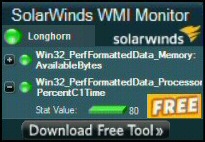
Windows Management Instrumentation (WMI) is one of the hidden treasures of Microsoft’s operating systems. Fortunately, SolarWinds have created a Free WMI Monitor so that you can discover these gems of performance information, and thus improve your PowerShell scripts.
Take the guess work out of which WMI counters to use when scripting the operating system, Active Directory, or Exchange Server. Give this WMI monitor a try – it’s free.
Download your free copy of WMI Monitor
PowerShell Profile Trap
Beware, if you use profile.ps1 to heavily modify your working environment, for example with $PSDefaultParameterValues, then your scripts may not work on other machines. To see if this is occurring launch PowerShell with the -noProfile parameter, then see if your own scripts work as designed.
Alternative Locations for Profile.ps1
It is possible to configure the profile.ps1 at other locations:
%windir%\system32\WindowsPowerShell\v1.0\profile.ps1
The above profile applies to all users and all shells.
%windir%\system32\WindowsPowerShell\v1.0\ Microsoft.PowerShell_profile.ps1
The above profile applies to all users, but only to the Microsoft.PowerShell shell.
As you see, one of the commands I used in profile.ps1 was cls. Actually, cls is an Alias for clear-host. Time to find out more about PowerShell’s Alias?
Summary of Windows PowerShell Profile
As you are likely to spend a great deal of time at the PowerShell command line, it makes sense to spend time configuring the startup folder and appearance of shell. The first step is to locate the location(s) where the key file called Microsoft.PowerShellISE_profile is kept. Once you have found the correct folder, then you can add instructions to the profile file.
If you like this page then please share it with your friends
See more Microsoft PowerShell tutorials
• PowerShell Tutorials • Methods • Cmdlets • PS Snapin • Profile.ps1 • Exchange 2007
• Command & Expression Mode • PowerShell pipeline (|) • PowerShell ‘where‘ • PowerShell ‘Sort’
• Windows PowerShell Modules • Import-Module • PowerShell Module Directory
If you see an error of any kind, do let me know. Please report any factual mistakes, grammatical errors or broken links.