Windows 7 Remote Desktop Connection Problems
Troubleshooting a remote desktop connection involves understanding the role of both the distant network host and the local client computer.
Key question: do we have the perfect world where both operating systems are Windows 7? Or is one of the connections Vista, XP, or even a member of the Windows server family?
Topics for Windows Remote Desktop Connection Problems
- Configure the Host Computer – Allow Connections
- Configuring Remote Desktop Connection on the Client Computer
- Problems with Remote Desktop Connection in Windows 7
- Remote Server Administration Tools (RSAT)
♦
Configure the Host Computer – Allow Connections
The situation is that you leave a Windows 7 machine running and wander to another Windows 7 machine on the same network. You want to check the email, or find an address in your contacts list. It’s a long walk back to the other machine so you decide to Remote Desktop. Fingers crossed that you have configured your own host machine to accept Remote Desktop connections from the client. This where you check:
Start Orb, Control Panel, System and Security, System, Remote Settings (Left menu), Allow Desktop (Section), Allow connections from computers

You can fine-tune the configuration by specifying users, or restricting the type of remote computer.
A Backdoor Registry Hack – fDenyTSConnections
There is a ‘backdoor’ registry hack whereby you can set Remote Desktop to allow connections. Let us imagine that you cannot remote desktop because on the host the radio button in the above screenshot is set to: Don’t allow connections to this computer. My zany technique involves editing the registry of the target machine. My idea succeeds or fails on the ability of regedit to Connect to network registry.
Note: You may have to Start the Remote Registry Service on the target machine. See here for a PowerShell script to start services.
Now our mission is to change the value of fDenyTSConnections from =1 to =0. Open regedit, File Menu, Connect Network Registry. Naturally, you have to connect to the correct registry hive on the target machine,
HKLM\System\CurrentControlSet\Control\Terminal Server, now find the Reg_DWord called fDenyTSConnections and set the value = 0 (zero)
Unfortunately, you have to reboot the target machine before the fDenyTSConnections setting takes effect. There must be service that you could start and stop but I have not found which one that is. Instead I use the following PowerShell command.
Restart-Computer -computerName DistWin7 -force
See more on fDenyTSConnections
Guy Recommends: SolarWinds Free Wake-On-LAN Utility
Encouraging computers to sleep when they’re not in use is a great idea – until you are away from your desk and need a file on that remote sleeping machine!
WOL also has business uses for example, rousing machines so that they can have update patches applied. My real reason for recommending you download this free tool is because it’s so much fun sending those ‘Magic Packets’. Give WOL a try – it’s free.
Download your free copy of SolarWinds Wake-On-LAN
Configuring Remote Desktop Connection on the Client Computer
The situation is that you have configured the host (remote / network) computer to allow connections. Now you want to launch the Remote Desktop Connection on the local client. To access mstsc.exe, click on the Windows Start Orb and in the Search dialog box, type Remote Desktop.
Double Click on Remote Desktop Connection – See screenshot.
Type the name of the computer that you wish to access. I also advise you to examine the Options before you click ‘Connect’.
Evaluate Solarwinds Dameware MRC
Problems with Remote Desktop Connection in Windows 7
Installing the program mstsc.exe rarely gives problems. Thus troubleshooting focuses on network connectivity and permissions. Once you get a basic remote desktop connection, there is potential for a whole set of new problems, for example, features such as printing or Aero Graphics don’t work.
Basic Troubleshooting Techniques to Get a Connection
Editions of Windows 7
The host computer, the distant one that you connect to, must be Windows 7 Professional, Business or Ultimate. However, the client can be running the home premium edition. The host could also be Vista, XP or even a Windows Server.
Hostname Problems – Remote Desktop cannot find computer…
Try connecting to an IP address rather than a computer name. Use ping to test the network connection, if there is a problem check the Host records at the DNS server.
If you have selected Network Level Authentication then you must type the full computer name at the client. For example mycomputer.local and not plain mycomputer. If in doubt, try ping mycomputer. The surest alternative is to check in the Control Panel, System and Security, System: Full computer name.
Enter Your Credentials
Make the connection to the host with a username that has previously logged on at that computer. Check in the Control Panel of the host machine to see that the user has permission to use remote desktop.
Firewalls
Disable the firewalls on both the local and remote computer. All other experts castigate me for this technique, but I do it to remove one variable and to free my mind; turning off the firewalls forces me to focus on other sources of configuration mistakes.
SolarWinds Firewall Browser 
Here is an utility where you can review firewall settings such as access control lists (ACL), or troubleshoot problems with network address translation (NAT).
Other reasons to download this SolarWinds Firewall Browser include managing requests to change your firewall settings, and testing firewall rules before you go live.
Guy recommends that you download a copy of the SolarWinds free Firewall Browser.
Problems Once You Make a Remote Desktop Connection
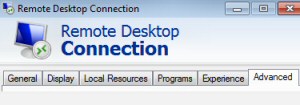
For problems relating to local resources, or Flip 3D, then check the Options button (see above), then examine the six tabs that you see in the screenshot to the right.
Aero Graphics
For a reason that I cannot fathom the ‘Experience’ defaults to the slowest connection ‘Modem’, thus if you have a high speed connection you miss out on Aero Graphics effects unless you select ‘LAN’.
Printers
As usual, printers give their fair share of problems. My advice is to go to the ‘Local Resources’ tab and experiment with, and without, the tick in the Printers box.
Save Credentials
I like to reduce hassle by saving credentials in the General tab. While it's not a problem in a HomeGroup, if the computers belong to a domain then you need to change this group policy.
- Logon as an administrator.
- Click the Start orb, in the ‘Search’ box type: gpedit.msc.
- Navigate to the Computer Configuration, Administrative Templates, System, and then Credentials Delegation.
- In the right pane, double-click Allow Saved Credentials with NTLM-only Server Authentication, click Enabled, and then click Show.
- In the Show Contents dialog box, click Add, type the name of the remote computer (server) in this format: TERMSRV\<computername>
- It maybe worth reading the help notes; for example, make sure you capitalize TERMSRV. Also, you could try using the asterisk * as a wildcard as in: TERMSRV\*
Guy Recommends: A Free Trial of the Network Performance Monitor (NPM) v11.5
v11.5
SolarWinds’ Orion performance monitor will help you discover what’s happening on your network. This utility will also guide you through troubleshooting; the dashboard will indicate whether the root cause is a broken link, faulty equipment or resource overload.
What I like best is the way NPM suggests solutions to network problems. Its also has the ability to monitor the health of individual VMware virtual machines. If you are interested in troubleshooting, and creating network maps, then I recommend that you try NPM now.
Download a free trial of Solarwinds’ Network Performance Monitor
Remote Server Administration Tools (RSAT)
In addition to its use for an ordinary user to connect to a client desktop, the same remote connection technology can also be used for an administrator to connect to a Windows server.
Remote Server Administration Tools (RSAT) for Windows 7 allows administrators to remotely manage roles and features, which are installed on a member of the Windows Server family. However, you have to be running the Enterprise, Professional, or Ultimate editions of Windows 7 to successfully install this add-on to manage the servers.
- Make sure that are at the Windows 7 computer, download the Remote Server Administration Tools for Windows 7 MSU package from the Microsoft Download Center.
- Open the RSAT package and install it.
- Click on the Start Orb, Control Panel, and then click Programs.
In the Programs and Features area, click Turn Windows features on or off. - In the Windows Features dialog box, expand Remote Server Administration Tools. Select the remote management tools that you want to install.
- Pin a shortcut to the Start menu or the Taskbar
Configuring Remote Desktop on the Server / Recipient / Network Computer
Summary of Troubleshooting Windows 7 Remote Desktop Connection
The first step in troubleshooting is to check that the distant network computer is setup to allow remote desktop connections. On the client computer test with ping that you can contact the target machine. Once you can make a basic connection examine each tab in the Options.
If you like this page then please share it with your friends
Microsoft Windows 7 Network Topics
• Windows 7 • Windows 7 Network Adapter Connection • Windows 7 Network Monitor
• Windows 8 Network Location • Windows 7 Private Network • Review of SolarWinds TFTP Server
• Windows 8 Configuration • Windows 8 Metro UI • Windows 8 Wireless • Network Performance Monitor


