Introduction to Windows PowerShell Cmdlets
With PowerShell you have a choice, you can either type commands directly at the shell’s command line, or else you can store the same commands in a text file. Naturally, you then call that script file, known as a cmdlet, from the PowerShell command line, or in the ISE (Integrated Scripting Environment).
As with other script languages, notepad is an alternative vehicle for writing or editing scripts, the only specific requirement is that you must save the cmdlet with the PowerShell extension of .ps1. Writing scripts has two extra benefits, it documents your commands, so that you don’t forget them, and also, these cmdlet files provide a record of your PowerShell achievements.
PowerShell Cmdlet Topics
- PowerShell Cmdlets (Command Let)
- 1) PowerShell Execution Policy Adjustment
- 2a) Filename and .ps1 extension
- 2b) Calling the filename
- Copy and Paste Into PowerShell
- Summary of Creating Cmdlets in PowerShell
♣
PowerShell Cmdlets (Command Lets)
First Meaning of PowerShell Cmdlet
Microsoft say that a cmdlet means a built-in PowerShell command, which corresponds to a single Verb-Noun pair. Such a cmdlet is often accompanied by an alias, for example: Get-Member with its alias of gm.
Second Meaning of PowerShell Cmdlet
In PowerShell circles there appears to be a second meaning for the word cmdlet. A PowerShell cmdlet is a series of commands, usually more than one line, stored in a text file with a .ps1 extension. It is this scriplet meaning of cmdlet that I feature on this page.
Advantages of Creating Cmdlets
Once you have experimented with a few basic instructions at the PowerShell command line, you may wish to store your code in its own cmdlet file. The benefit is that you can replay these perfect lines of instructions later. The advent the ISE (Integrated Scripting Environment) in PowerShell 2.0 makes this strategy easy to embrace.
My tactic is once my lines of code achieve my basic objective, I call for ‘SaveAs’, and then use the copy for further development. Seven times out of ten the ‘development’ goes hopelessly wrong, at which point I am so grateful that I saved a working copy.
I hope that you are getting the idea of a cmdlet. Spend time perfecting the PowerShell commands, then save them in a text file. This technique saves you typing in lines of code and the command line, instead, you call the cmdlet by typing: dot slash and followed by its filename, for example .\memory. Incidentally, building PowerShell cmdlets fits in with my strategy of assembling scripts in sections.
Guy Recommends: Free WMI Monitor for PowerShell
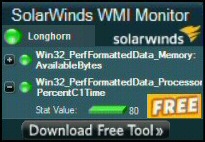
Windows Management Instrumentation (WMI) is one of the hidden treasures of Microsoft’s operating systems. Fortunately, SolarWinds have created a Free WMI Monitor so that you can discover these gems of performance information, and thus improve your PowerShell scripts.
Take the guess work out of which WMI counters to use when scripting the operating system, Active Directory, or Exchange Server. Give this WMI monitor a try – it’s free.
Download your free copy of WMI Monitor
Creating PowerShell Cmdlets – Quick Instructions
Creating these Windows PowerShell cmdlets is straightforward, and most rewarding. Here are the three essential tasks to ensure that the instructions in these script files execute correctly.
- For security, the operating system won’t run PowerShell scripts by default. Thus we need to adjust the ExecutionPolicy in order for PowerShell scripts to run. The better method is to issue this instruction at the PowerShell command line: Set-ExecutionPolicy RemoteSigned. Alternatively you could edit the registry.
- Make sure that you save the filename with a .ps1 extension. However PowerShell ISE will do this automatically.
- In PowerShell 1.0 I learned the knack of calling the file from the PowerShell command line, either by typing the full path:
D: \scripts\filename, or if you were already in the D: \scripts folder, just type:
.\filename (note the rhythm: dot slash filename). - In PowerShell v 2.0 (and later versions) I simply open the files in the ISE and run them in this GUI.
Note 1: Let me explain, this is how I like to call cmdlets from a subdirectory. D: \scripts is my main script directory, however, I create cmdlets in subdirectories such as: D: \scripts\wmi\32proc.ps1 . Assuming that I am at the PowerShell command line in the D: \scripts folder, all that I type at the prompt is: .\wmi\32proc.
Note 2: It took me ages to deduce that all I needed was plain .\filename. Avoid over-think, when you call the cmdlet file you don’t need to add the extension. Adding .ps1 is not necessary .\filename will suffice.
Note 3: While this dot slash (.\) method of executing the cmdlet script seems cumbersome, Microsoft decided on this method for security reasons. Hackers, phishers and the like could trick people into executing a rogue PowerShell script by clicking on it. However, nothing happens – unless you proceed the script with .\ this safety feature offers a measure of protection from such mischief makers.
Creating PowerShell Cmdlets – Detailed Instructions
The following instructions are the same as those above, but with extra step-by-step directions.
1a) PowerShell’s ExecutionPolicy Command
I prefer this method, which employs PowerShell’s own commands to control the script Execution Policy. At the PS prompt try the following 3 commands:
# PowerShell Set-ExecutionPolicy
Get-ExecutionPolicy
# Now try:
Set-ExecutionPolicy -?
# Here follows the crucial command:
Set-ExecutionPolicy RemoteSigned
See more on Set-ExecutionPolicy
Guy Recommends: A Free Trial of the Network Performance Monitor (NPM) v11.5
v11.5
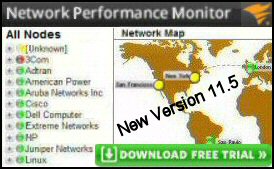
SolarWinds’ Network Performance Monitor will help you discover what’s happening on your network. This utility will also guide you through troubleshooting; the dashboard will indicate whether the root cause is a broken link, faulty equipment or resource overload.
What I like best is the way NPM suggests solutions to network problems. Its also has the ability to monitor the health of individual VMware virtual machines. If you are interested in troubleshooting, and creating network maps, then I recommend that you try NPM now.
Download a free trial of Solarwinds’ Network Performance Monitor
1b) PowerShell Registry Adjustment
For security, and by default, Microsoft prevent PowerShell from executing cmdlet scripts; consequently we need to change a specific registry setting to allow our cmdlets to execute. If you don’t make my amendment you may get the following error message when you call for a cmdlet script. ‘The execution of scripts is disabled on this system’.
Our task is to open the registry and amend the value of the REG_SZ ExecutionPolicy, specifically change Restricted to RemoteSigned. There are two additional values called Unrestricted and AllSigned. However, RemoteSigned is the best because it allows you to run scripts locally, while preventing people from hacking you from other machines e.g. the internet. To check the setting launch regedit and navigate to:
HKLM\SOFTWARE\Microsoft\PowerShell\1\ShellIds\Microsoft.PowerShell
(In some versions of PowerShell the path maybe slightly different.
HKLM\SOFTWARE\Microsoft\PowerShell\1\ShellIds\Microsoft.Management.Automation.ps1)
Change this registry key:
REG_SZ ExecutionPolicy RemoteSigned.
2a) Filename and .ps1 Extension
Filename and .ps1 extension
When you create your PowerShell cmdlet with notepad, the filename must have a .ps1 extension for example, RunningProcess.ps1. One way of creating such a file is to save your PowerShell commands in notepad, then from the file menu: Save As, Type, All Files, RunningProcess.ps1. Just to be doubly sure, you could put the filename in double quotes, for example: "RunningProcess.ps1". I maybe paranoid, but please check the file is not called RunningProcess.txt or RunningProcess.ps1.txt.
What you put in filename.ps1 are the same commands that you type in the PowerShell box. You could start by creating a file with a simple Verb-Noun pair, for example just:
Get-Process.
This may seem too simple, but my philosophy is keep things straightforward and build on success.
Here is a more advanced set of instructions just to give you the idea of the joy of creating a PowerShell script.
# This script generates a report about Running Services
# Guy Thomas May 2013
Clear-Host
"Services that are running on $Env:ComputerName"
Get-Service | Where-Object { $_.status -eq "Running"}
"`n Report generated at " + (Get-date)
Learning Points
®